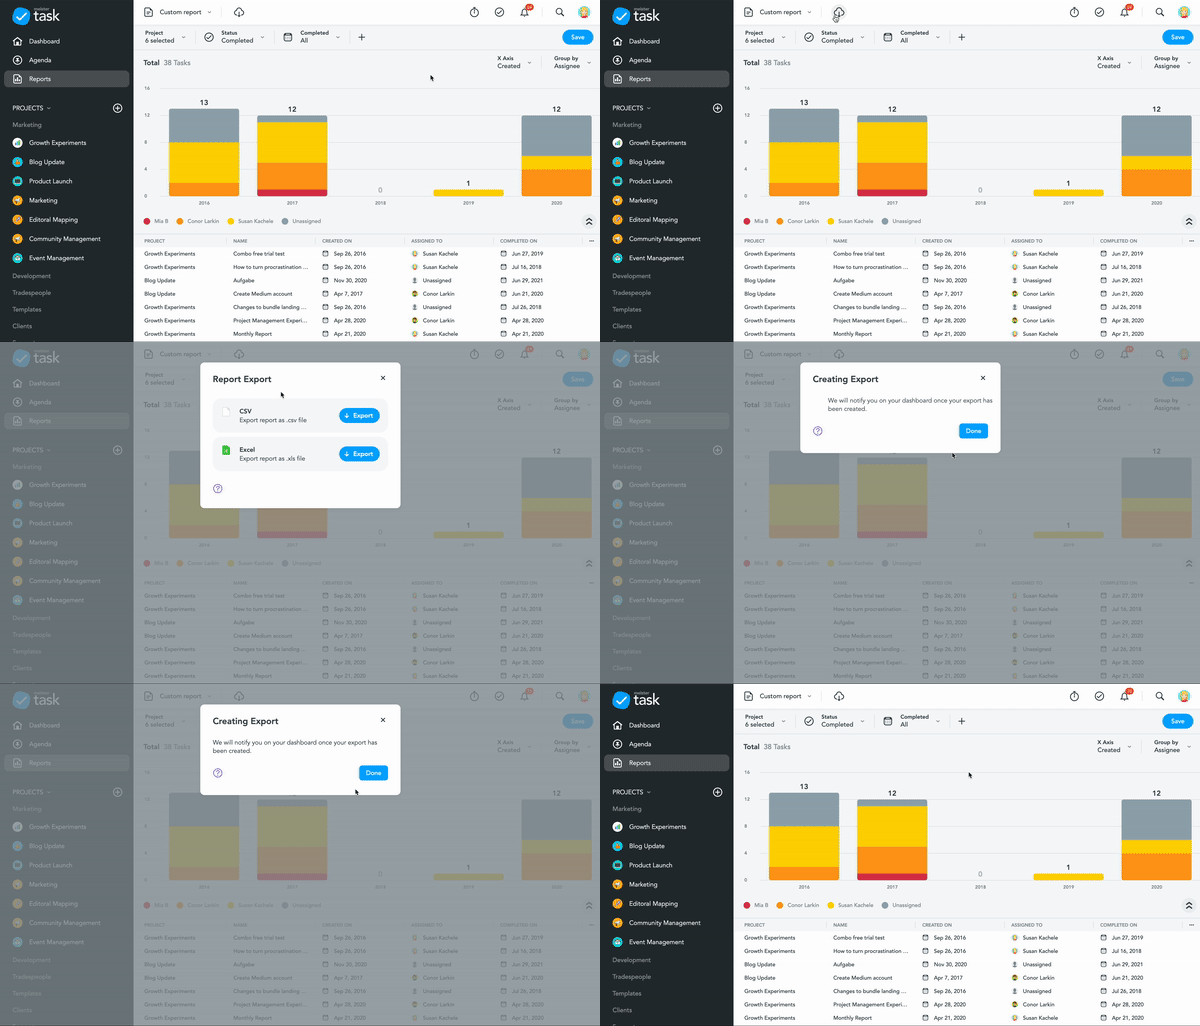
Reports add a statistics-driven element to project management, allowing you to analyze, track and gain valuable insight into project performance through analytics.
How to Create Reports with MeisterTask
In this video tutorial you’ll learn how to generate custom reports with MeisterTask and save or export them.
What are Reports?
Reports allow you to track, gather, and analyze data on project performance, adding a statistics-driven element to your project management. Reports work by quickly collecting project data and analyzing them using filters chosen by the user.
Reports in MeisterTask can be broadly separated into two categories: Quick reports and Custom reports.
- Create a Quick report with preset filters to quickly gain general insights into your projects.
- Create a Custom report by choosing your own filters and generating analytics tailored to your needs. Discover data on project performance, task completion, time logged, and more.
Generate a Quick Report
Quick reports are standardized Reports with preset filters. You can choose from 5 different types of quick reports, each focussing on a specific type of task:
- All Open Tasks
- Recently Created Tasks
- All Completed Tasks
- Recently Completed Tasks
- All due Tasks
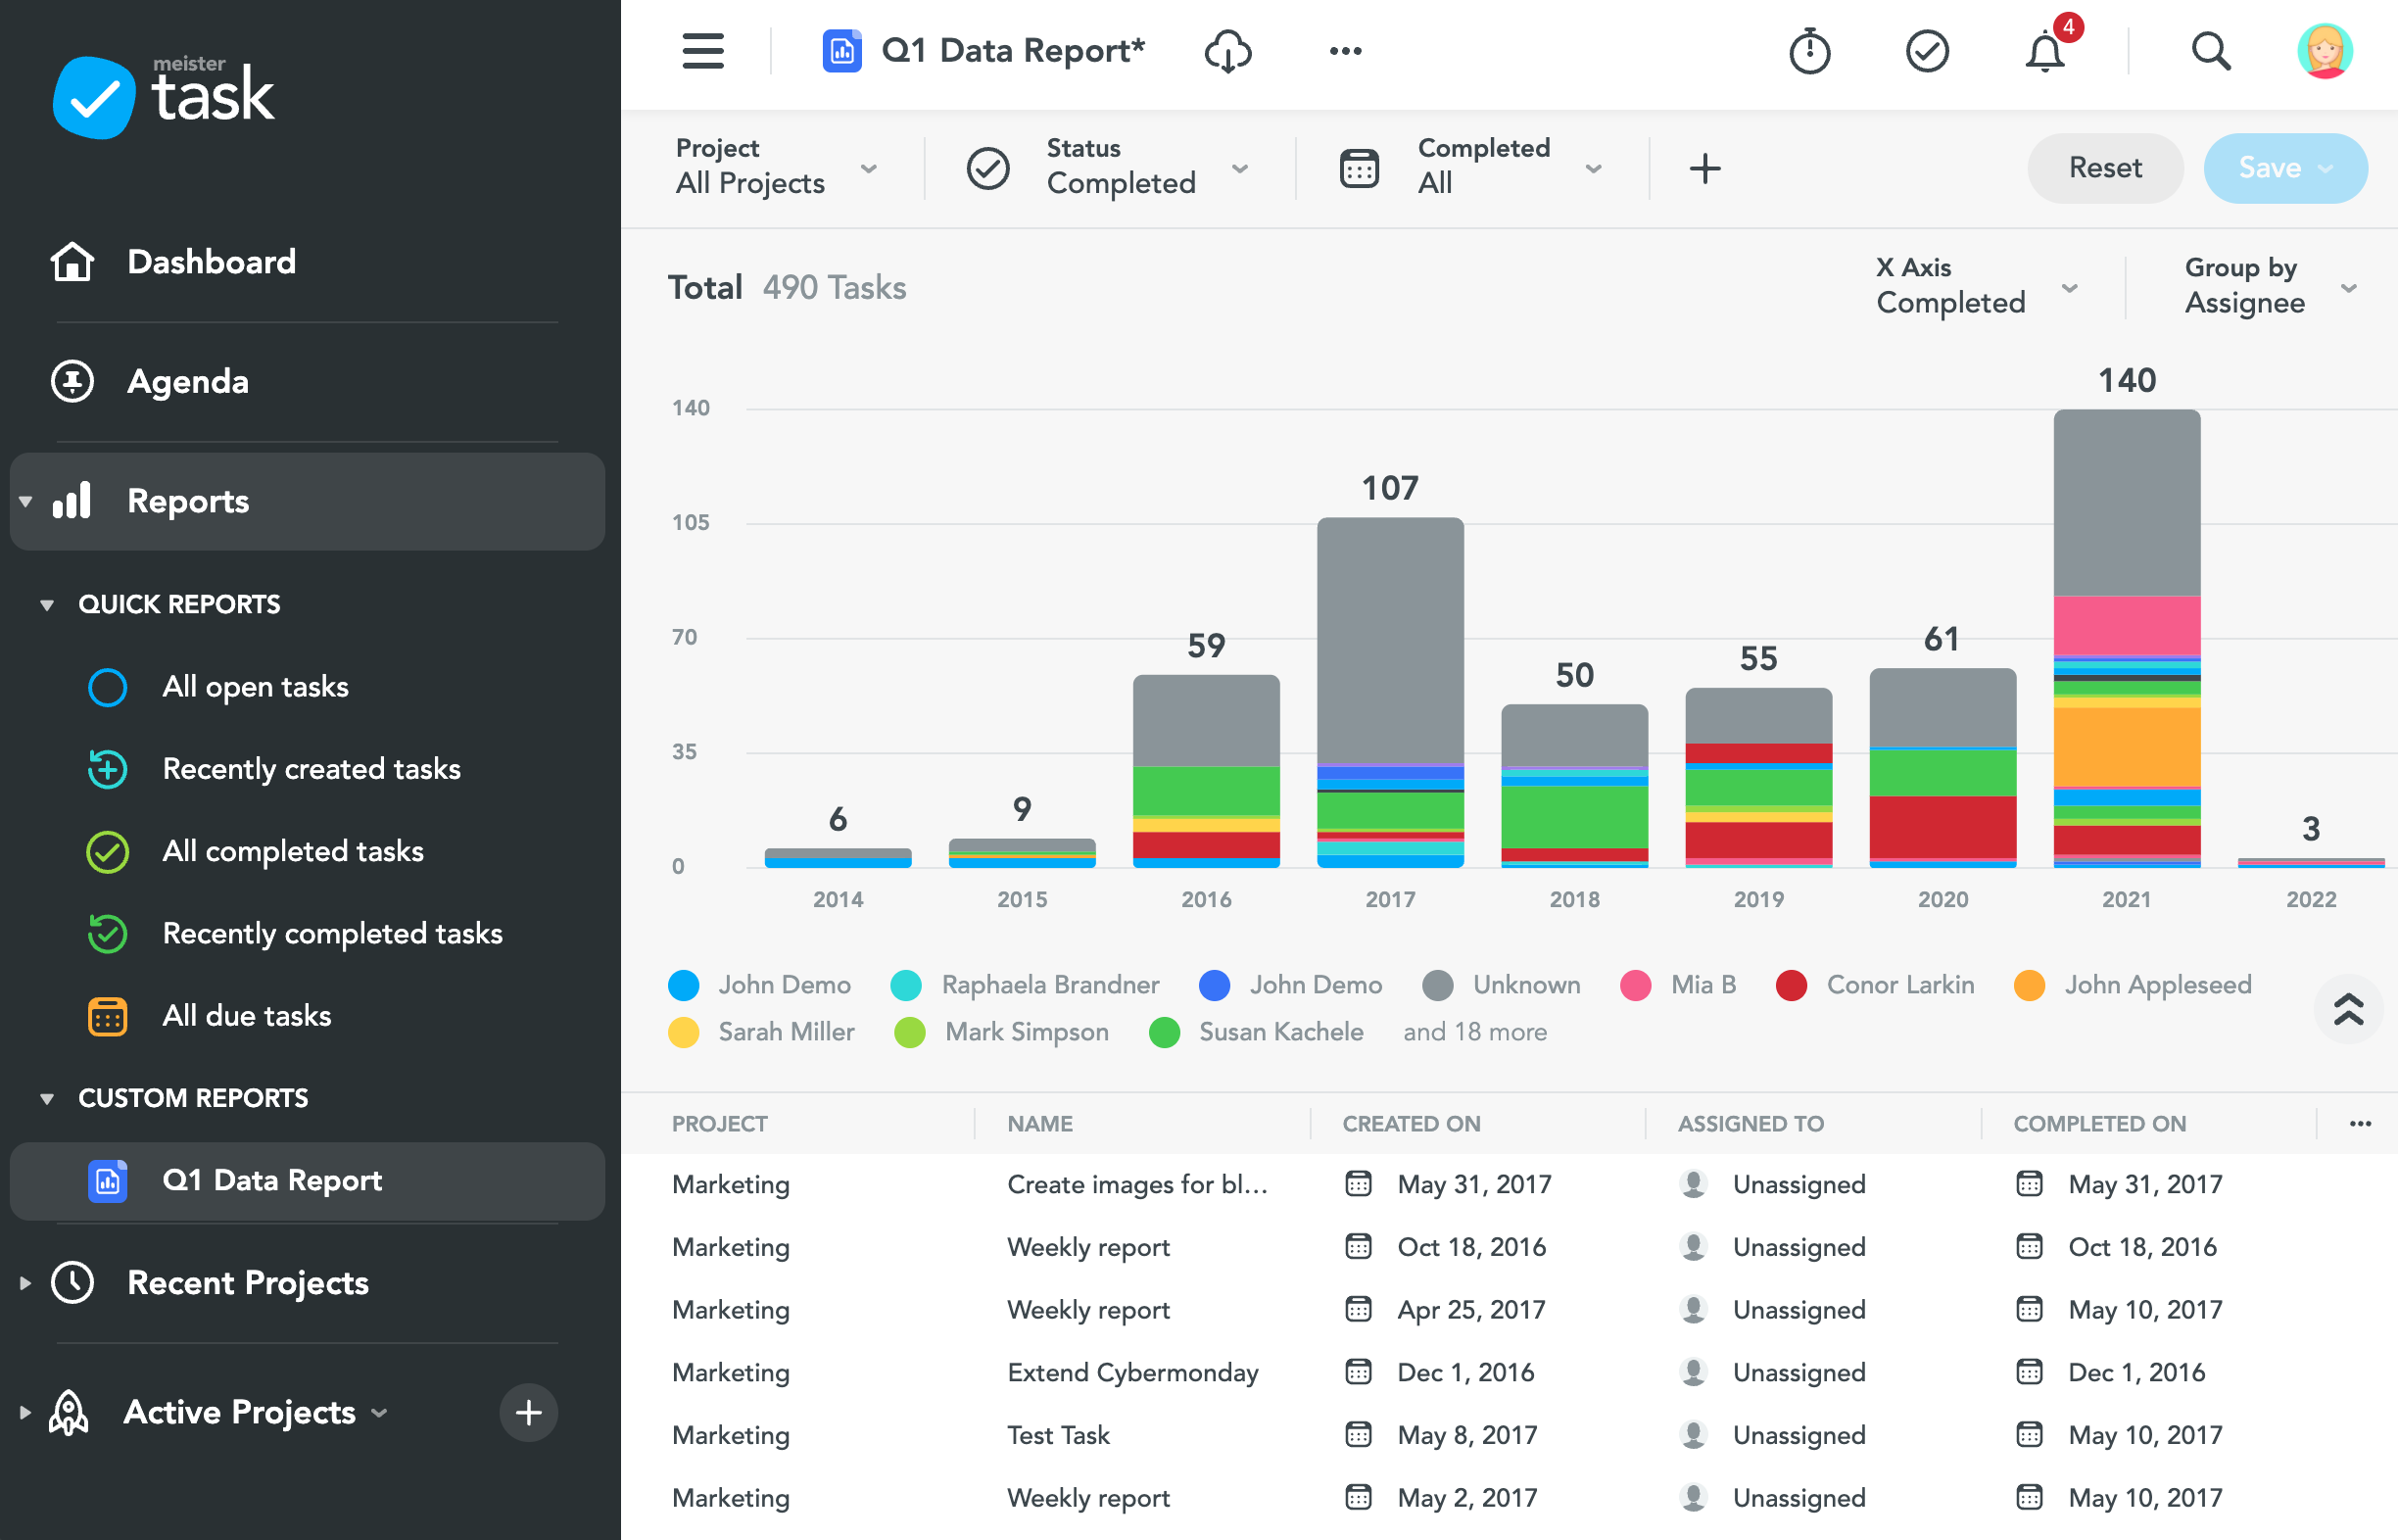
Quick reports can be easily generated directly from the left sidebar.
- Click the small expand arrow next to Reports on the left sidebar.
- Select Quick Reports.
- Choose the type of quick report you’d like to generate. The reports interface will immediately appear.
- Click the “Project” widget in the top-left corner of the Reports Interface and select the project(s) for which you’d like to generate your report.
- Your completed quick report should now be displayed in the Reports Interface.
Understanding your Report Data
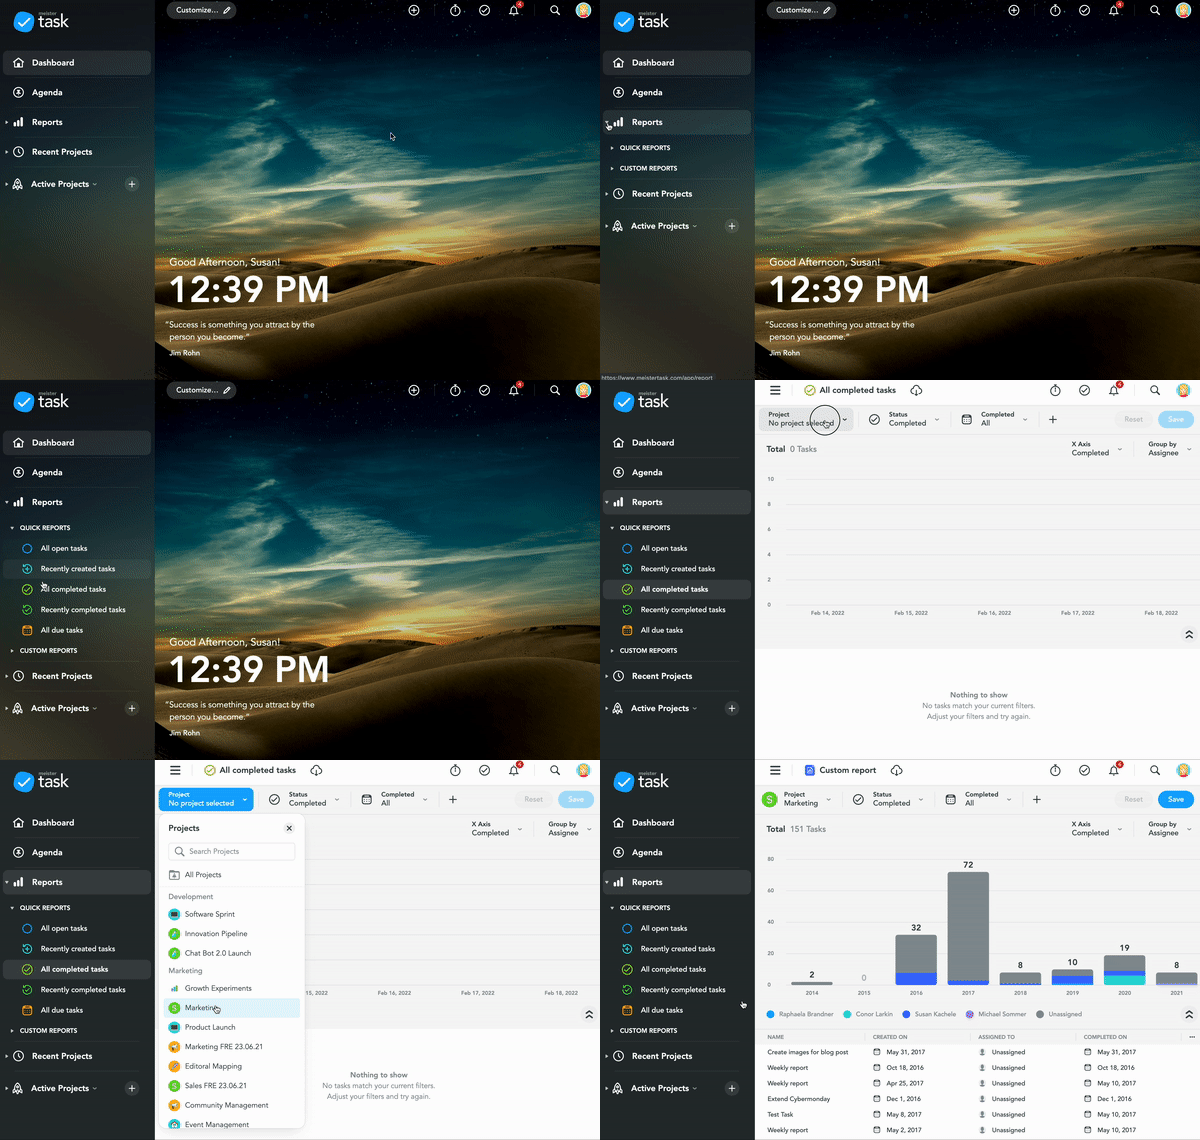
Once you’ve generated a quick report, it immediately becomes visible in the reports interface. Let’s take a look at a completed quick report which shows data on All Completed Tasks:
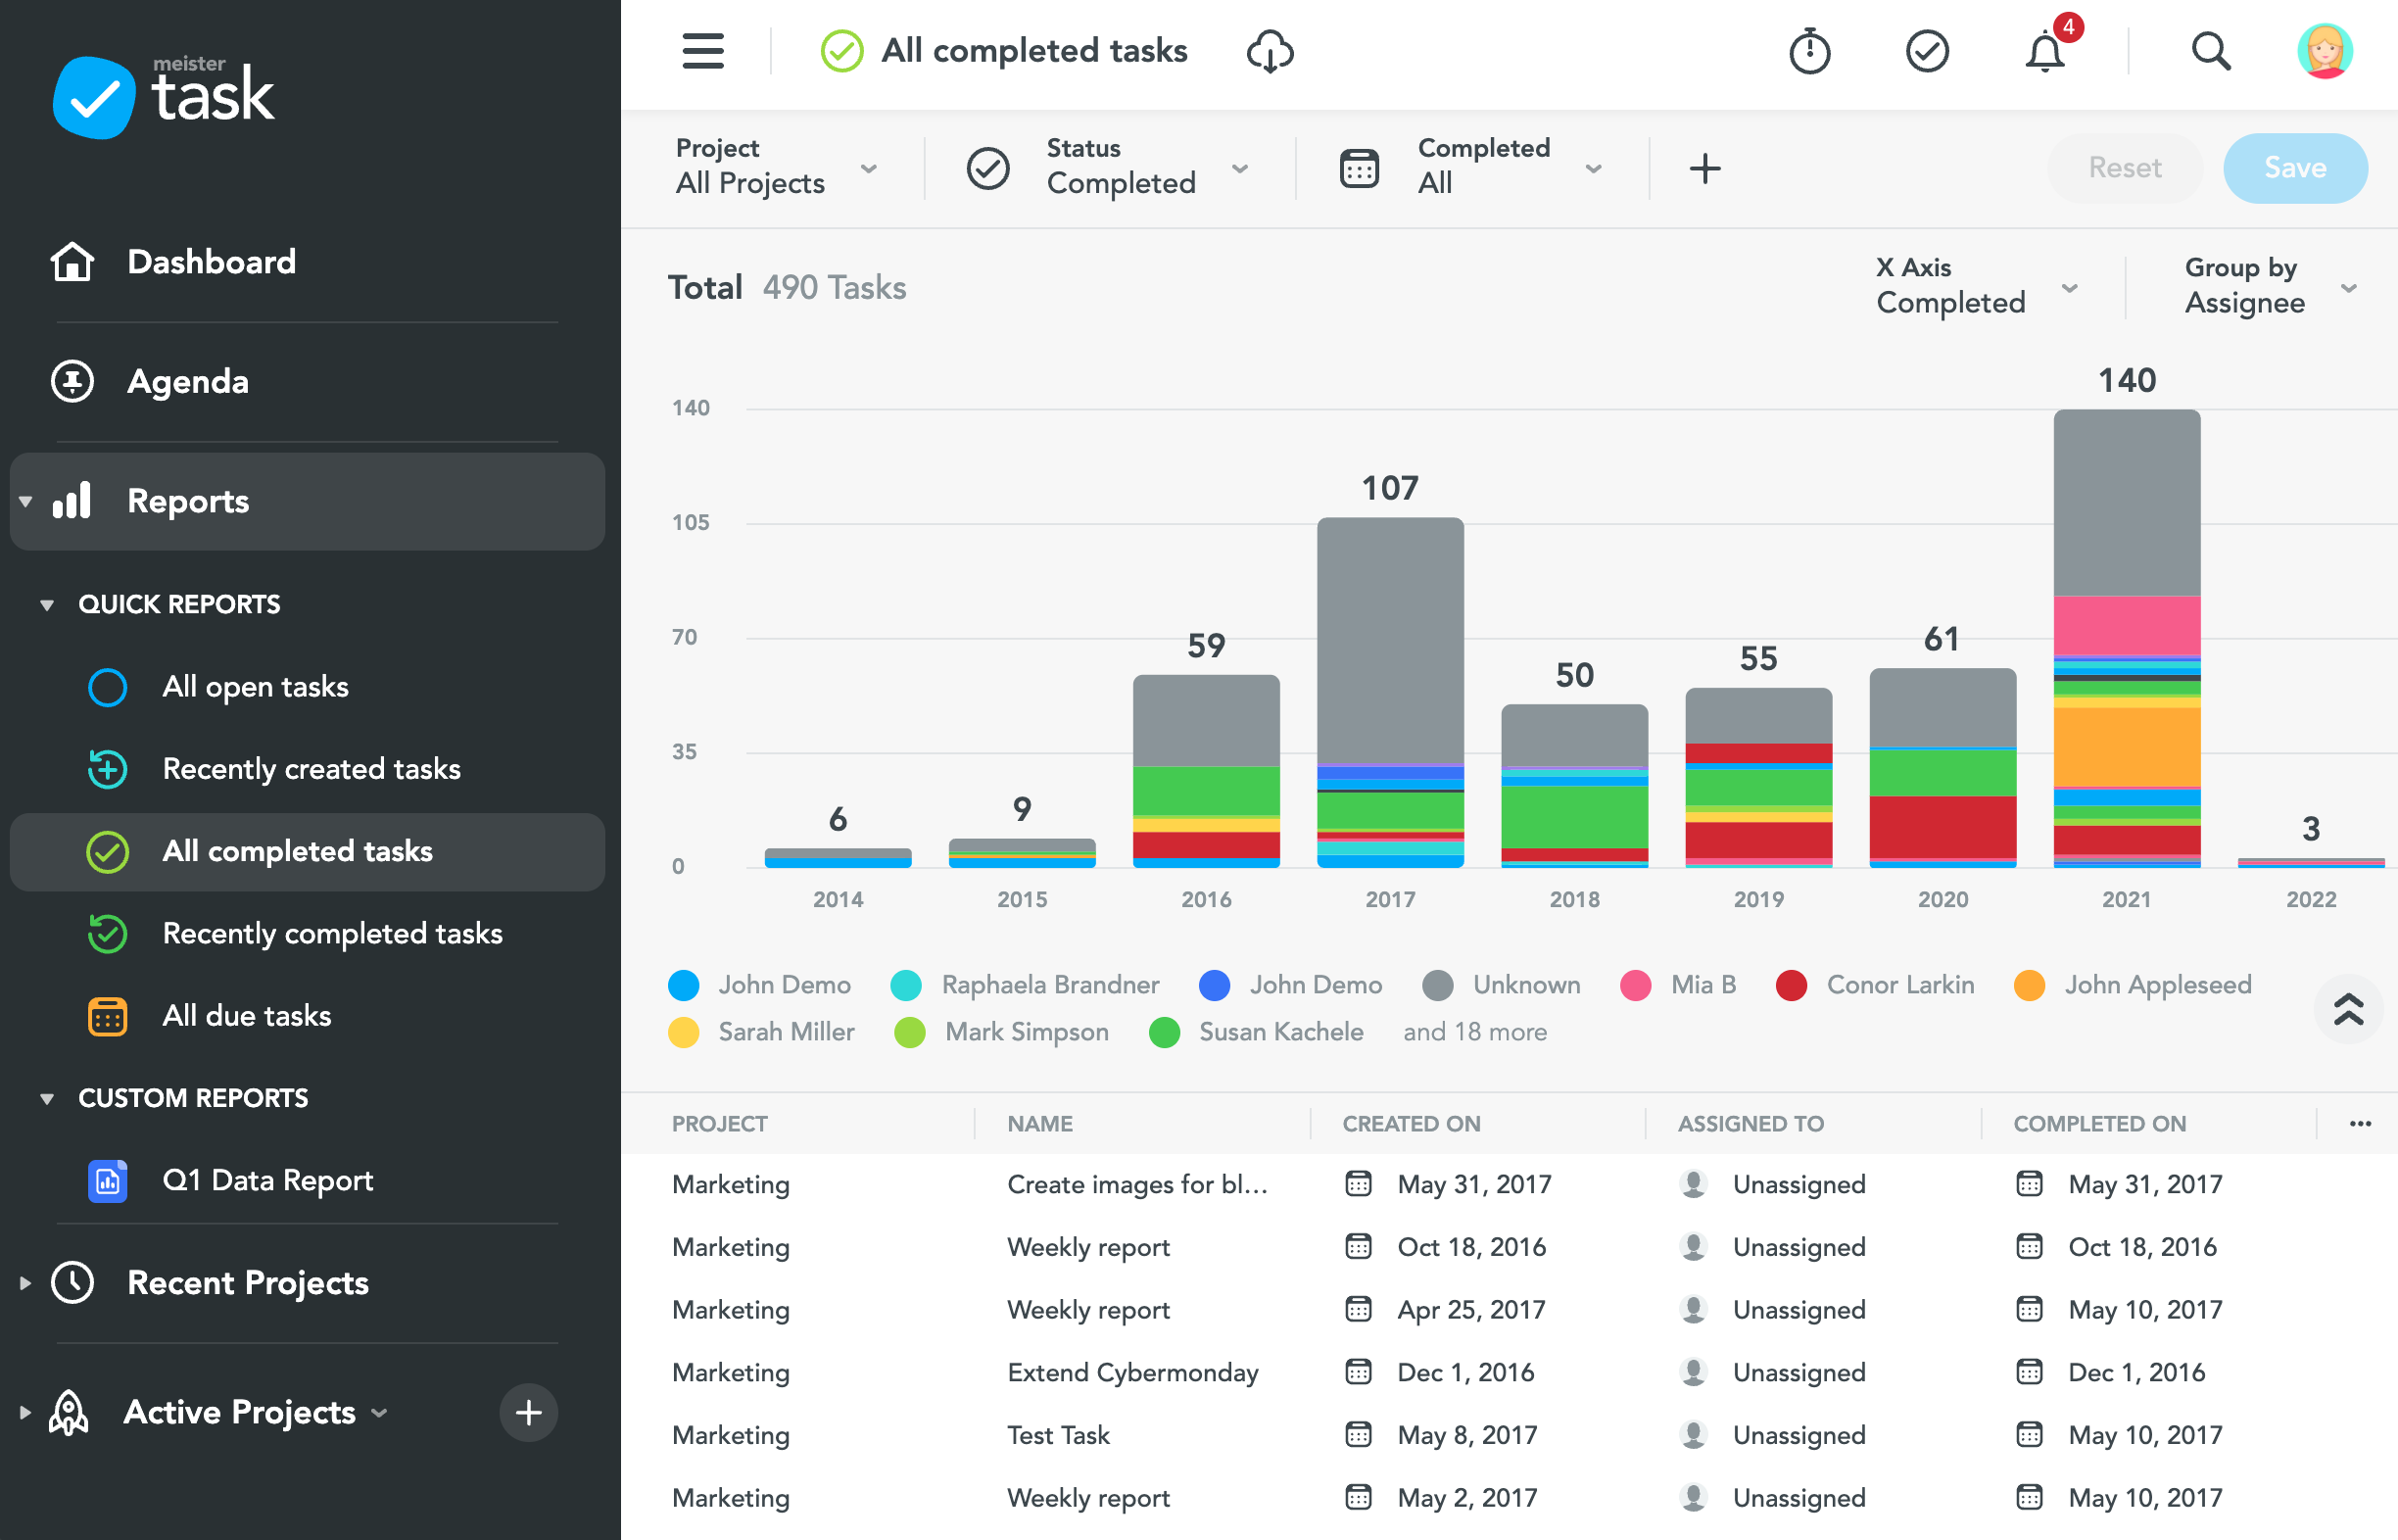
The report is divided into two halves:
- The top half of this Reports Interface shows a bar chart detailing the subject of this report: completed tasks. Individual Bars are color-coded to show which team member completed the task. The X-Axis of this Report shows the year in which tasks were completed.
- The lower half of this Report shows a task overview. Here, we can see detailed information on every task included in the Report.
Generate a Customized Report
Quick reports are convenient, but MeisterTask’s reports feature truly becomes powerful once you learn to customize reports according to your analytical needs.
You can customize your reports in four basic ways:
- By changing which projects you’d like to include in your report
- By adding filters to your report
- By changing the sort dates for tasks in your report (X-Axis)
- By changing how your bars are grouped and color-coded (Y-Axis)
The screenshot below shows where each element can be adjusted, followed by a detailed explanation.

- The Project Filter allows you to choose which project(s) you’d like to include in your report.
- In the Filters Bar, you can add, edit and remove filters to your report. By adding filters, you can filter which tasks will be included in your report. You can filter tasks by:
- Date Range
- Task Status
- Assignee
- Tags
- Switching the X-Axis between created, completed and due date determines the date used to sort projects on the X-Axis of your report.
For example: If you select “created” for the X-Axis, tasks will be sorted and shown by their creation date. - Changing how your tasks are grouped alters how the bars (Y-axis) are color coded and broken down into sub-categories. You can see what each color represents in the legend located below the bar graph.
Save Customized Report Settings
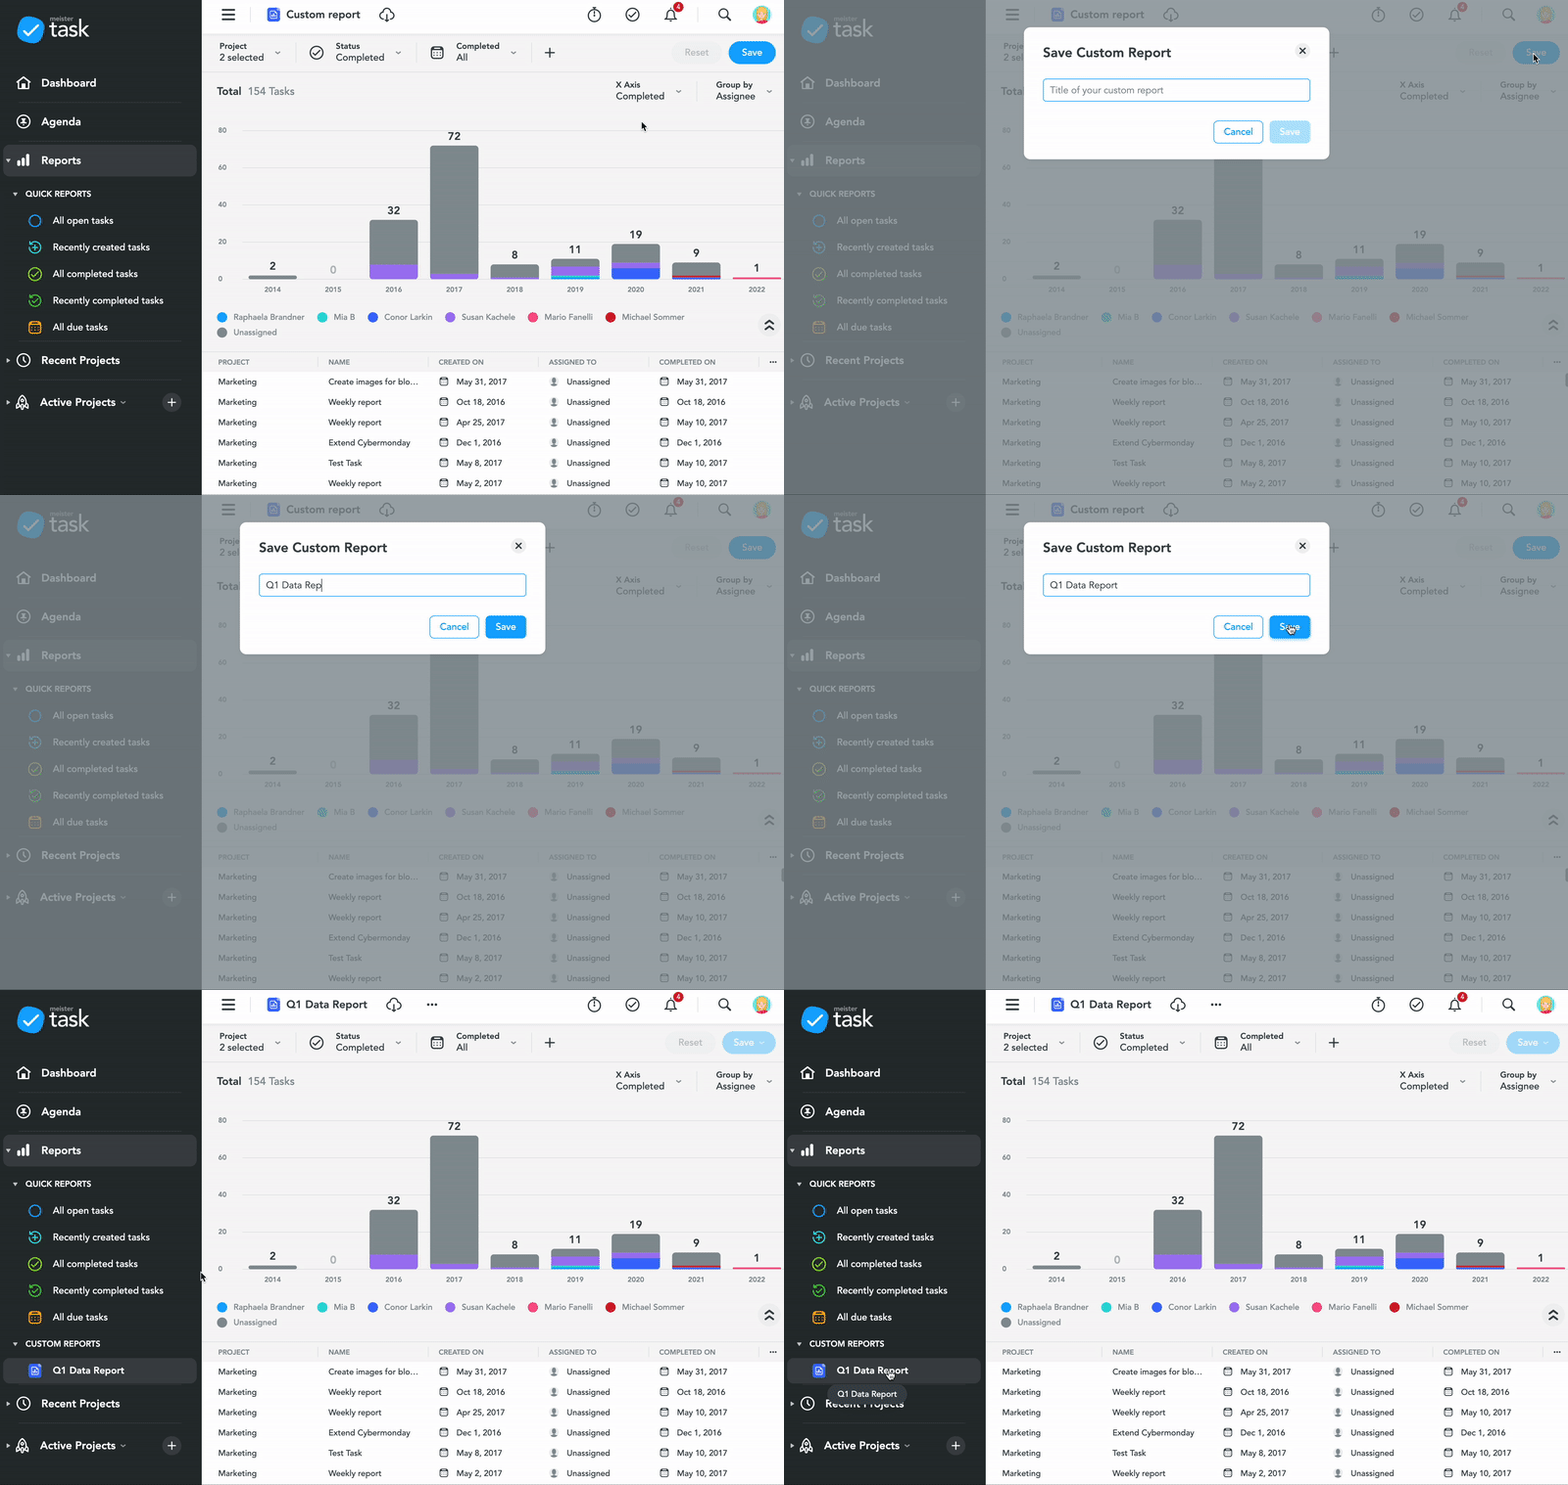
Once you’ve set up customized parameters for your reports, you can save these settings for later use. To do this:
- After you’ve configured your customized report, click the Save button in the top-right corner of the reports interface.
- Enter a name for your custom report and click Save.
- You can now access your customized report settings from the Left Sidebar under Custom Reports:
Export your Reports
Data from your reports can be exported as an Excel document (XLS) or CSV file. To export a Report:
- Generate the Report you want to export.
- Click the Export cloud at the top of the Reports Interface.
- Choose your desired format and select Export.
- You’ll receive a notification on the Dashboard when your exported file is ready. Click Download Now to download your data.
