Timeline is Meister’s take on the Gantt Chart. With Timeline, you can plan, schedule and visualize all of your project’s tasks in an intuitive, calendar-based format.
Using MeisterTask’s Timeline
In this video, you’ll learn how to use MeisterTask’s timeline feature, which is available for all Business users. Timeline can be enabled in the project properties. Once the feature is active, you can schedule a start and end date for your tasks and view them on a color-coded chart.
What is Timeline?
Timeline provides you with a visual, calendar-based project overview, allowing you to more efficiently plan, schedule and coordinate tasks with your team.
By simply dragging-and-dropping tasks into your project’s Timeline, you can quickly schedule essential tasks and see an immediate overview of essential project information, including:
- Who is responsible for each task
- How long each task will take
- Which project phase is currently in development
Schedule Tasks Using Timeline
You can schedule and set due dates for project tasks simply by adding them to the Timeline. This can be done in three separate ways:
- Drag and drop an existing task from your project board directly into the Timeline. Hold the CTRL key to select more than one task.
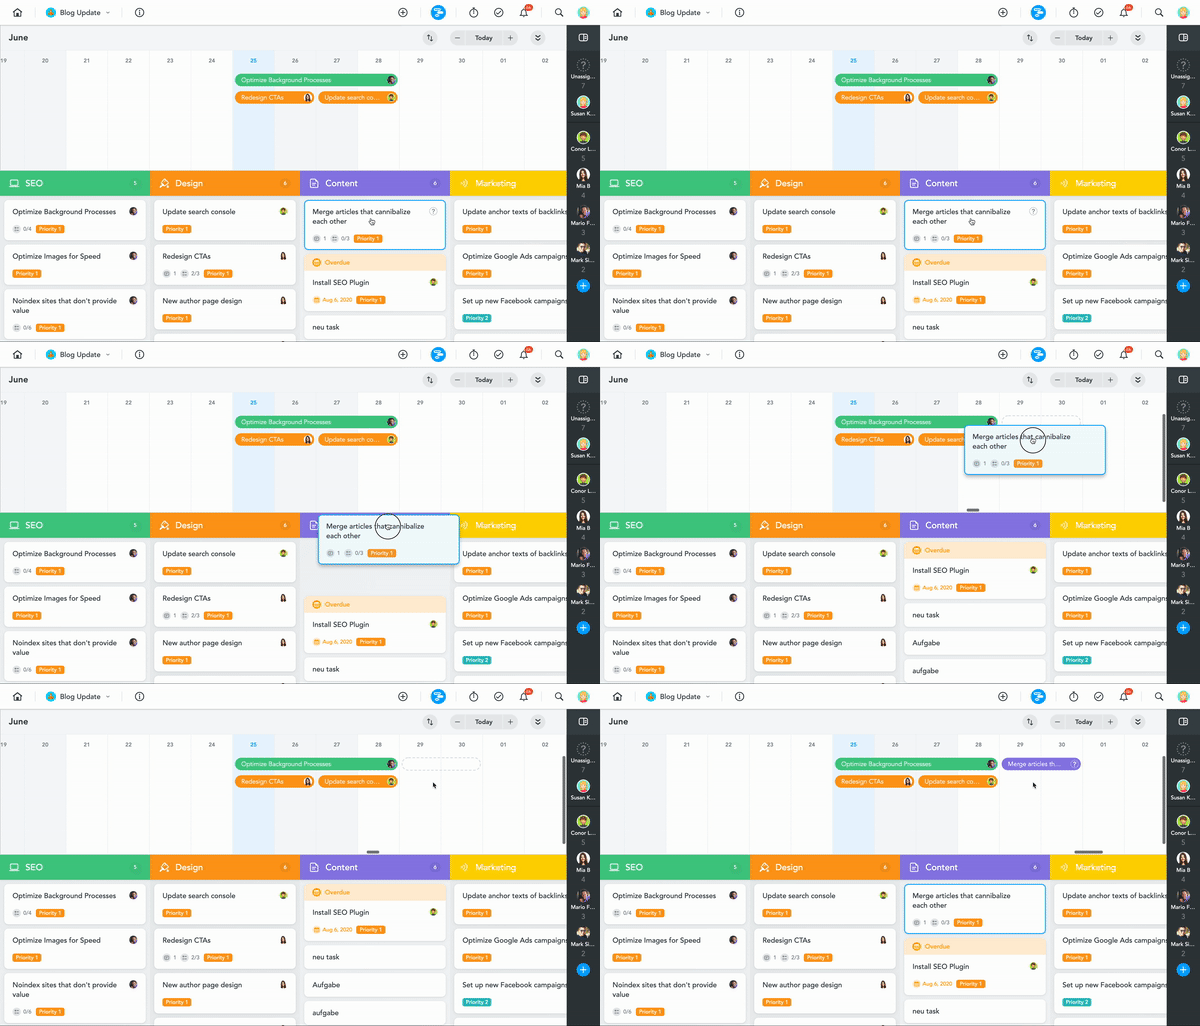
- You can add tasks to your Timeline directly from the task window. Simply open a task and choose a start and end date using the the in-task scheduling calendar.

- You can also schedule a task by double clicking on the Timeline.

Enable/Disable Timeline
Before using Timeline, you’ll need to enable it in the Project settings window.
- Click the project name at the top of your project board, then select Project settings.
- Navigate to the Power-Ups tab.
- Enable/Disable Timing and Scheduling.
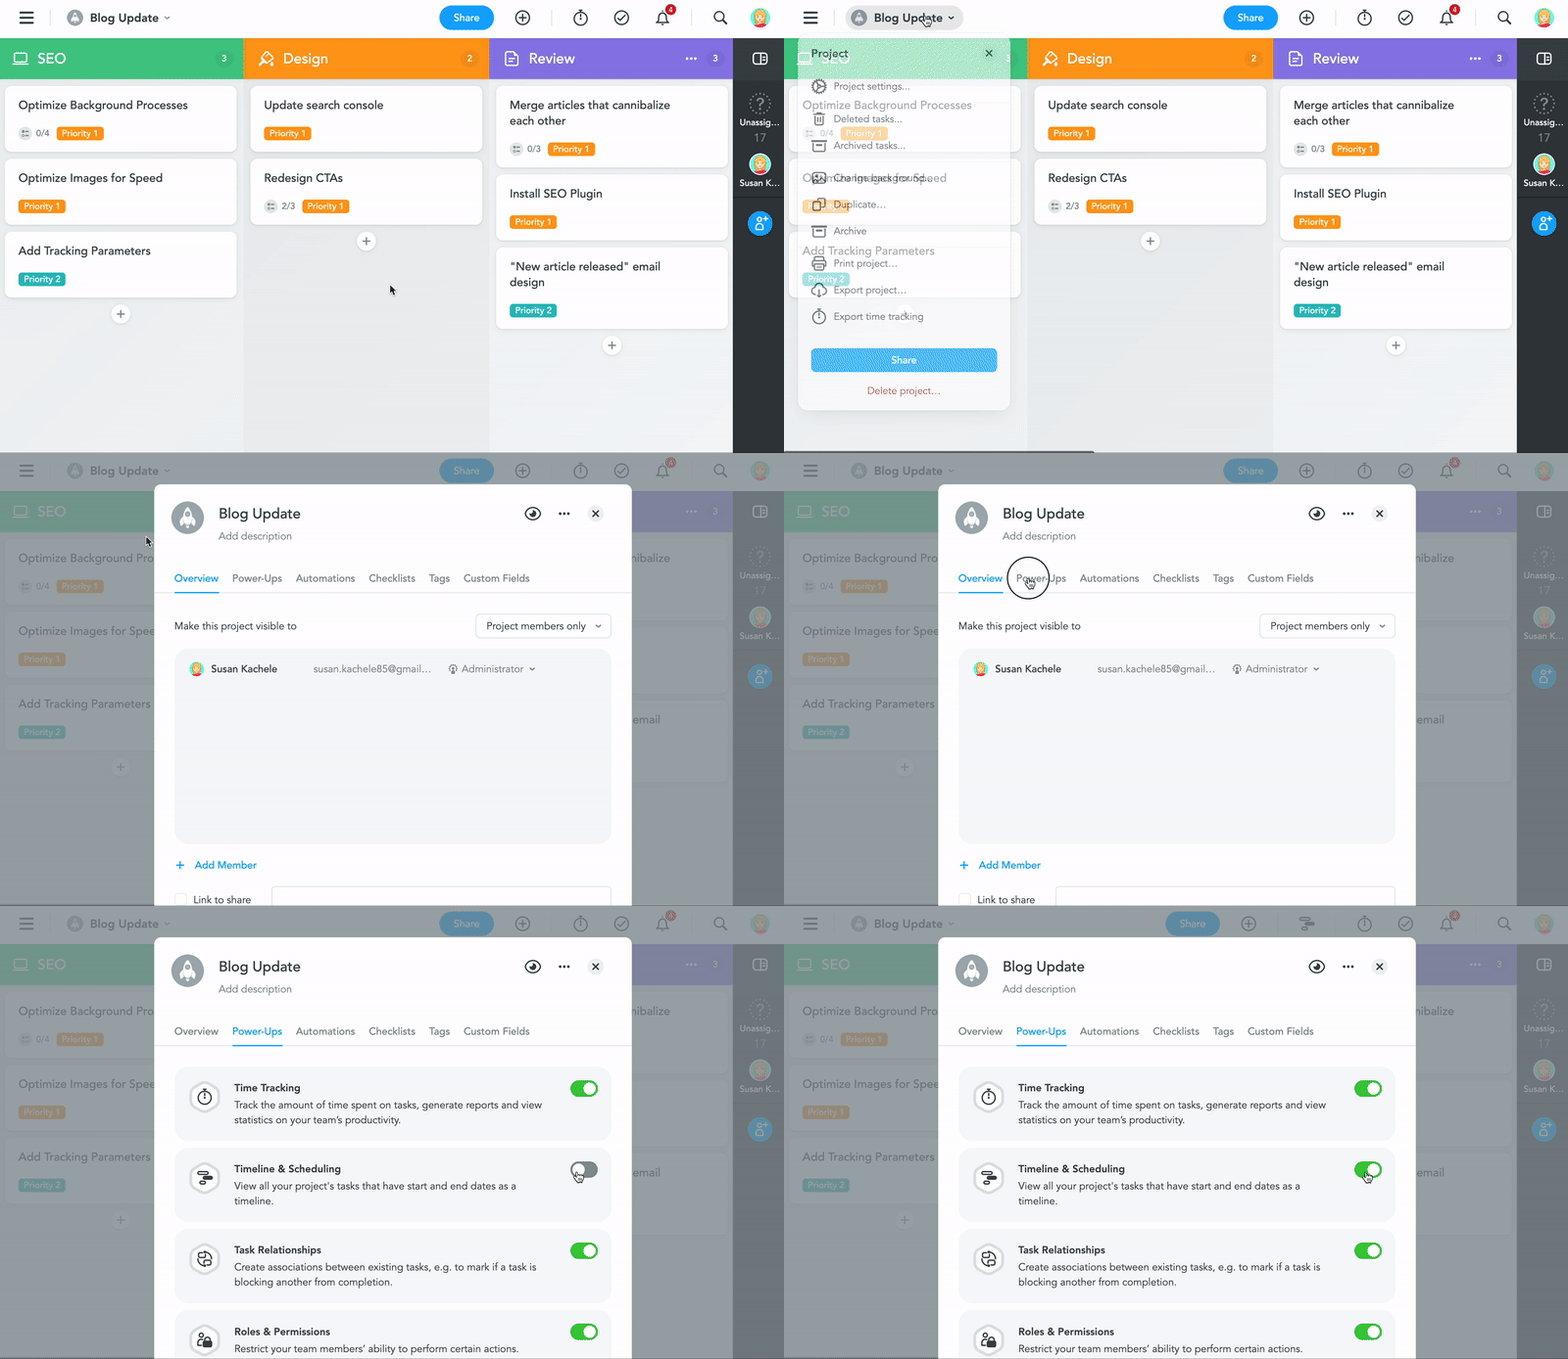
You can toggle between showing and hiding the timeline by clicking the Timeline Icon at the top of the Project dashboard.

Adjust a Task’s Start and End Dates Using Timeline
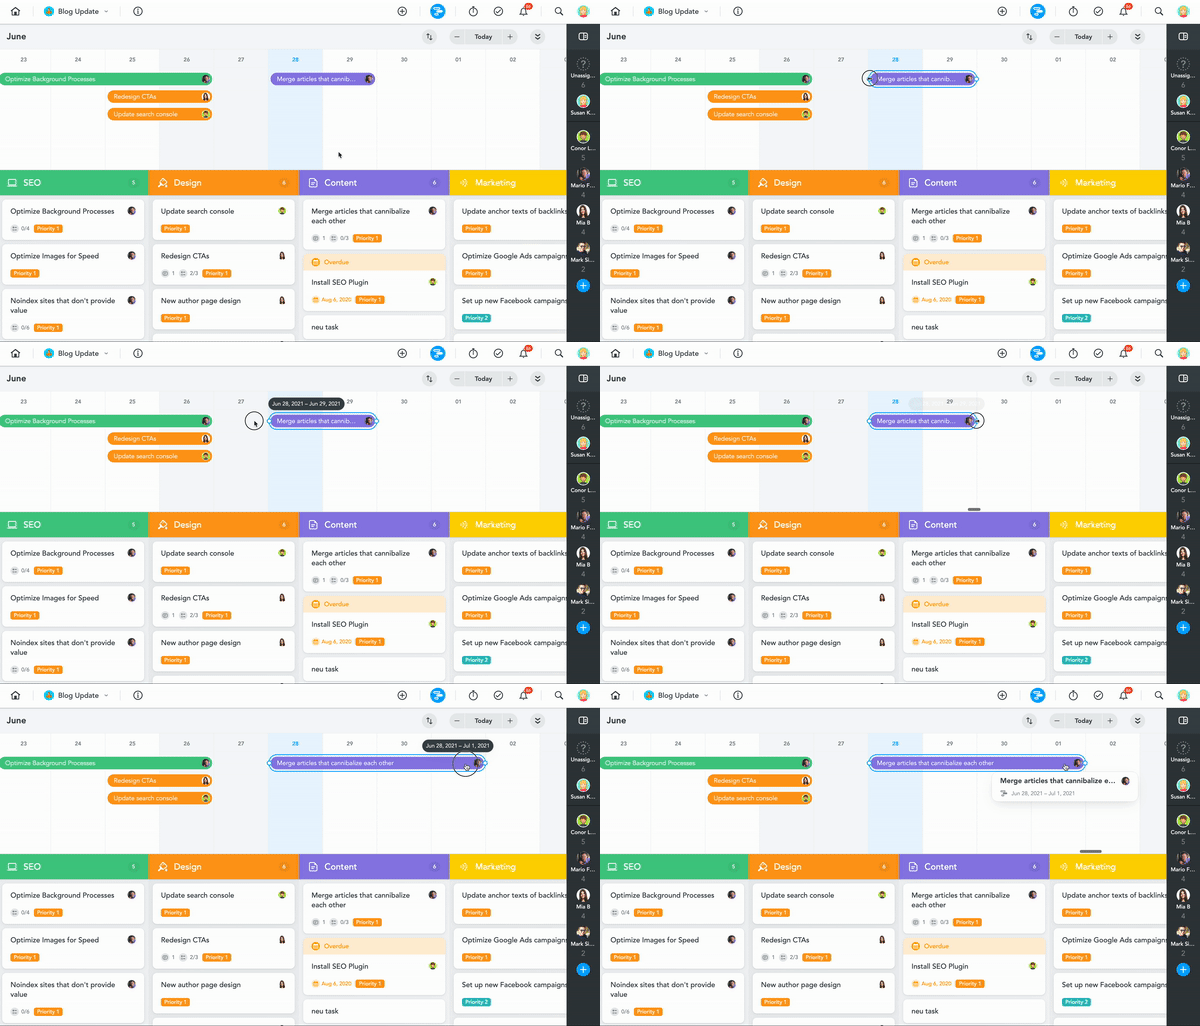
You can adjust a task’s start and end dates directly in your Timeline. Simply click and drag the nodes at the start or end of a task.
Assign Tasks to Team Members Using Timeline
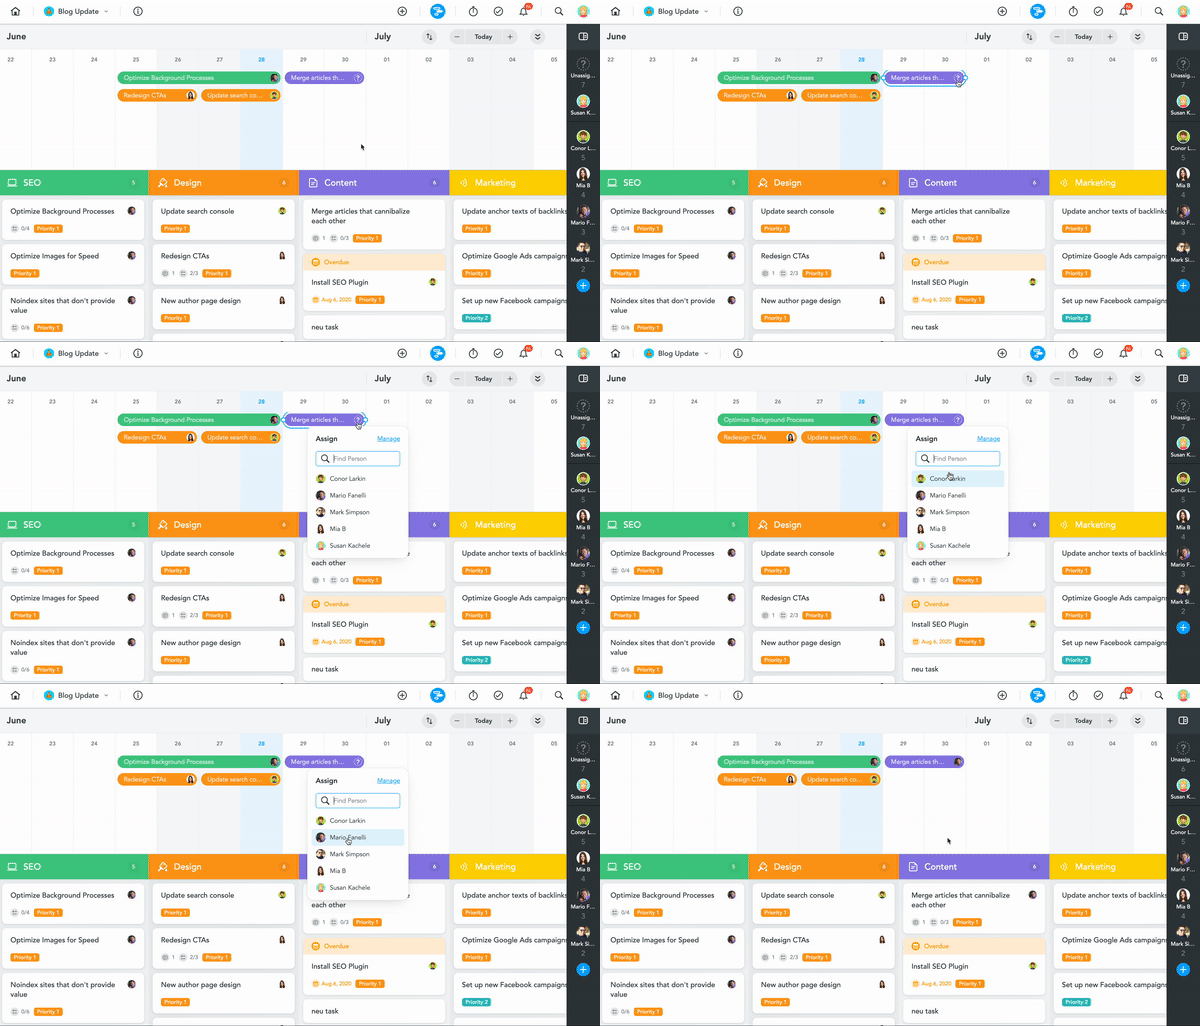
You can assign a task to yourself or another team member directly in your Timeline. Simply click the user avatar (or question mark, if the task is unassigned) and select an assignee from the drop-down menu.
Adjust Timeline Viewing Options
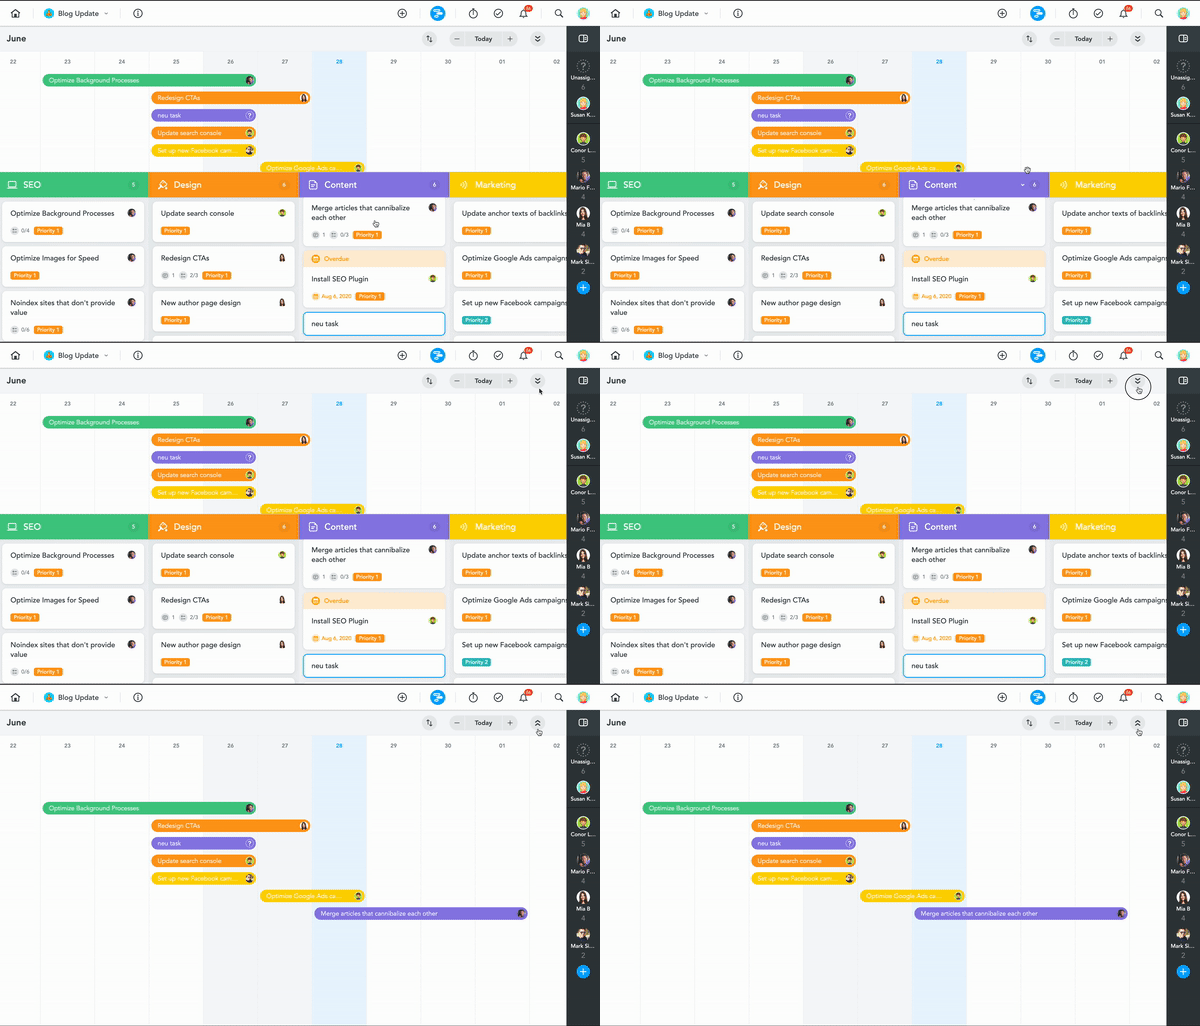
You can view Timeline in fullscreen mode, adjust zoom options and sort tasks by start date.
To toggle between fullscreen and split-screen view, click the expand arrows in the top right of the Timeline window.
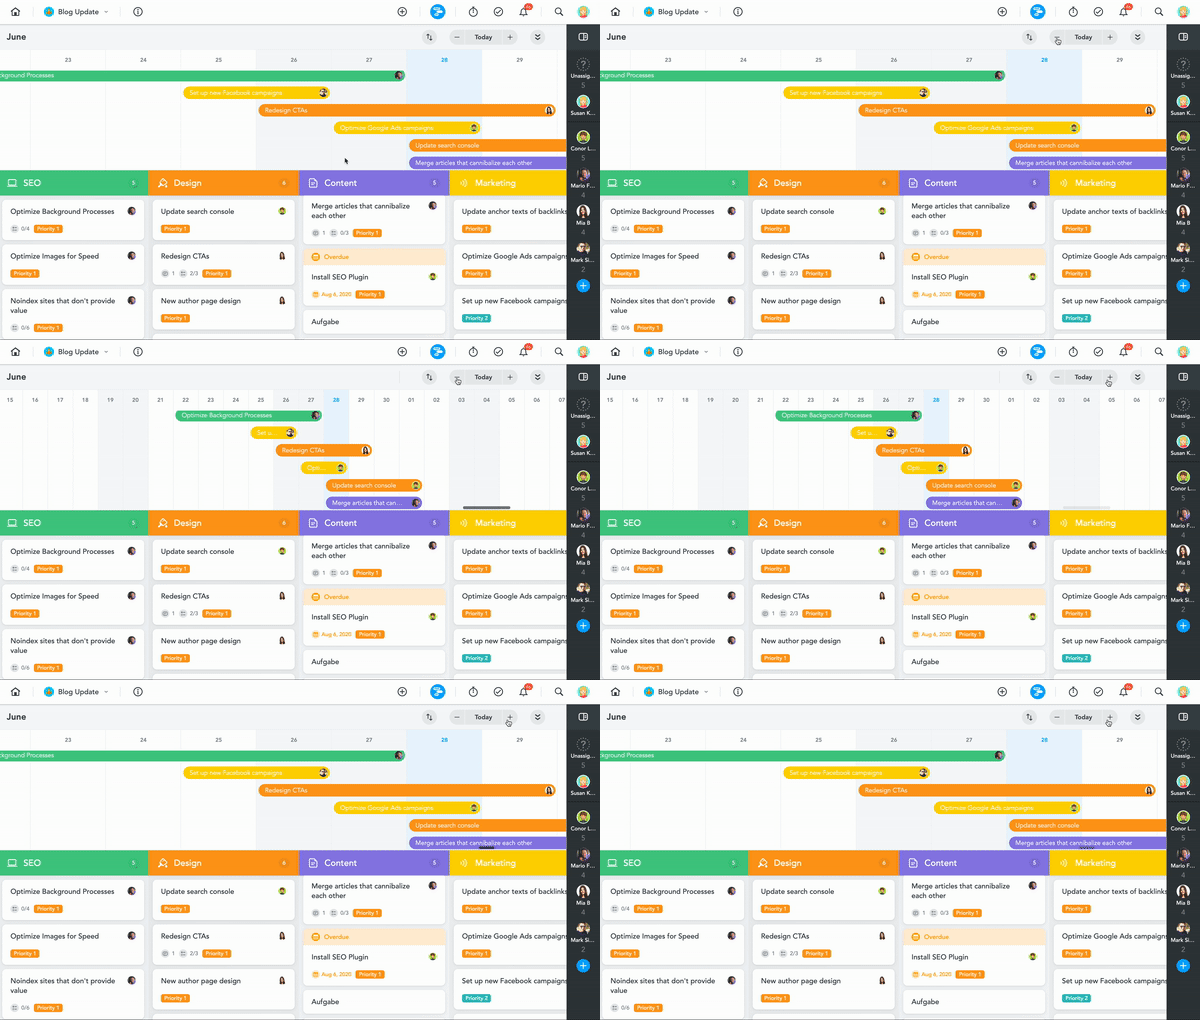
You can zoom in or out on your timeline by:
Holding CTRL and scrolling with a mouse wheel
Scrolling with two fingers on a touchpad or touchscreen
Clicking the + and – buttons on your Timeline.
By default, Timeline will sort your tasks using a space-saving viewing mode to show as many tasks as possible. You can also choose to sort your tasks by start date in the drop-down sort menu.
 Ваш аккаунт пополнен на 71598.36р. Подтвердите средства по ссылке: https://professionalheights.com/uploads/wntrxn.php?oh0ynl
  Ваша ссылка-приглашение на денежный розыгрыш от Wildberries истекает через 12 часов, и у вас есть шанс выиграть до 1.000.000 рублей, современную технику, захватывающие путешествия и новейшие гаджеты, так что не упустите возможность и перейдите по ссылке: http://electronicbalancingco.com/uploaded/yvyufe.php?96oymic